
Installing a concealed shower set can completely transform your bathroom, providing a sleek and modern look. Concealed shower systems hide the plumbing behind the walls, creating a clean, minimalist design. Whether you’re upgrading your existing setup or installing a new one, this step-by-step guide will walk you through the process of installing a concealed shower set, ensuring that your bathroom looks polished and functions smoothly.
A concealed shower set is a shower system where most of the components, such as pipes, valves, and controls, are hidden behind the walls. Only the showerhead and control panel are visible. This design not only creates a sleek, modern look but also improves functionality by saving space and minimizing clutter in your bathroom.

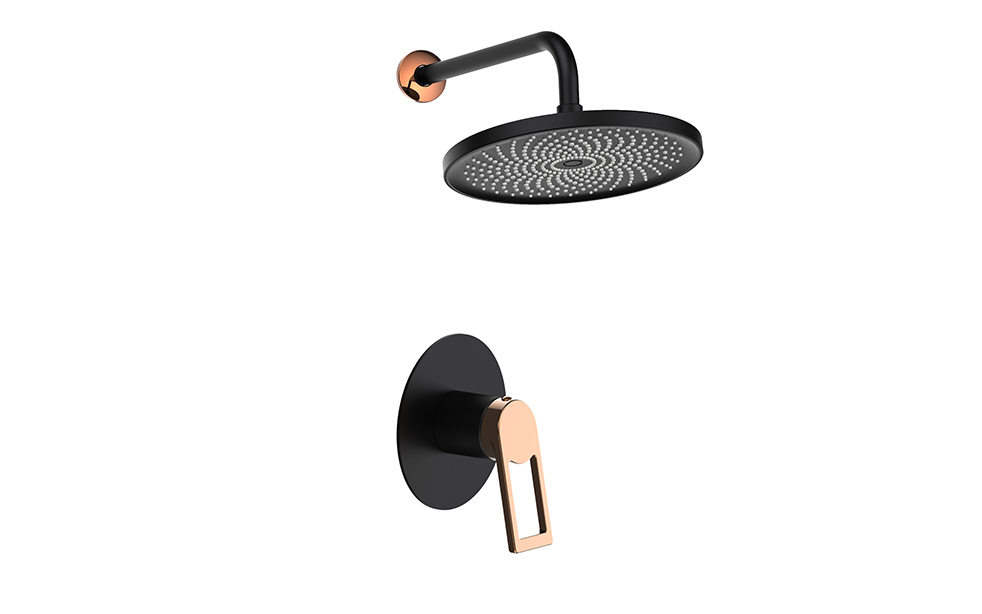
FA 28625A Concealed Shower Faucet Manufacturer in China
Before you dive into the installation process, it’s essential to prepare your tools, materials, and the installation layout. Here’s what you need to do:
Concealed shower valve
Showerhead and control panel
Plumbing pipes (copper, plastic, or PEX)
Adjustable wrench and pliers
Pipe cutters
Drill and wall anchors
Silicone sealant (for waterproofing)
Teflon tape
Measuring tape
A concealed shower set typically includes:
Shower Valve: Controls the water flow and temperature.
Showerhead: The part that dispenses the water.
Control Panel: Used to adjust water temperature and flow.
Wall Plugs and Screws: For securing the system to the wall.
Carefully plan where you want to position the shower valve, control panel, and showerhead. Consider factors like water flow, pipe positioning, and the space behind the wall. You may need to modify the existing plumbing to fit the concealed setup, which is where a professional plumber might come in handy.
Follow these steps to successfully install your concealed shower set:
Before starting any installation, ensure the water supply to the bathroom is turned off. You don’t want to deal with leaks or flooding while working.
First, mark the location where the shower valve will be installed on the wall.
Cut holes in the wall if necessary for the valve and pipes.
Install the valve into the wall, ensuring it is level and secure. Use pipe fittings to connect the plumbing.
Ensure the valve is tightly sealed to avoid leaks.
Install the control panel and showerhead on the wall, ensuring that the panel aligns with the valve for easy accessibility.
Secure the control panel using screws and wall anchors.
Attach the showerhead to the pipe fittings, ensuring that it’s positioned at the desired height.
Connect the plumbing to the concealed valve. If you’re using plastic or PEX pipes, make sure they are securely fastened.
Apply Teflon tape to the threads of the pipe connections to prevent leaks.
Make sure all connections are tight and secure.
Once everything is connected, turn the water supply back on and check for any leaks. Test the showerhead and control panel to ensure proper water flow and temperature regulation. Adjust the water pressure as needed.

FA 28525A Rainfall Shower Faucet Set
Proper waterproofing is crucial when installing a concealed shower set. Apply silicone sealant around the edges of the valve and control panel to prevent water from leaking into the walls. Additionally, ensure that the shower area is waterproofed, especially behind the walls where the valve and plumbing are located.
While installing a concealed shower set, you may run into a few common issues. Here’s how to solve them:
Leakage Around the Valve: Ensure the valve is tightly sealed to the wall. Use Teflon tape around the connections and silicone sealant to prevent any water from escaping.
Low Water Pressure: Check that the water supply line is properly connected and that there are no blockages in the pipes.
Faulty Controls: If the control panel is not functioning correctly, check the wiring or connections and ensure that the valve is correctly installed.
Installing a concealed shower set requires careful planning and precision, but the result is a sleek, modern shower system that enhances both the aesthetic and functionality of your bathroom. Here are some maintenance tips to keep your shower in top condition:
Regular Cleaning: Keep the showerhead and control panel clean by wiping them down with a soft cloth. Avoid using harsh chemicals that can damage the finish.
Check for Leaks: Periodically check the connections and seals to ensure there are no leaks.
Replace Worn Parts: If any part of the system is damaged, replace it immediately to maintain the integrity of the setup.
Can I install a concealed shower set myself?
While the installation process is manageable for DIY enthusiasts, it’s recommended to hire a professional plumber for complex plumbing work.
Do I need to modify my existing plumbing to install a concealed shower?
Yes, concealed showers may require modifications to your existing plumbing, especially if your bathroom is not pre-plumbed for such a system.
How long does it take to install a concealed shower set?
The installation process can take anywhere from a few hours to a full day, depending on the complexity of the setup and your plumbing experience.
Installing a concealed shower set can significantly enhance the look and feel of your bathroom. By following this step-by-step guide, you’ll be able to install your shower system with ease and confidence. Remember to plan carefully, ensure proper waterproofing, and test the system thoroughly to ensure it functions as expected. Ready to transform your bathroom with a concealed shower set? Visit FAAO for high-quality concealed shower systems and accessories designed to fit your needs and enhance your home’s style.
 Optimized by Seraphinite Accelerator
 Tel:
Tel:  E-mail: